Back to the (home)lab Again! Cisco 3650-CX
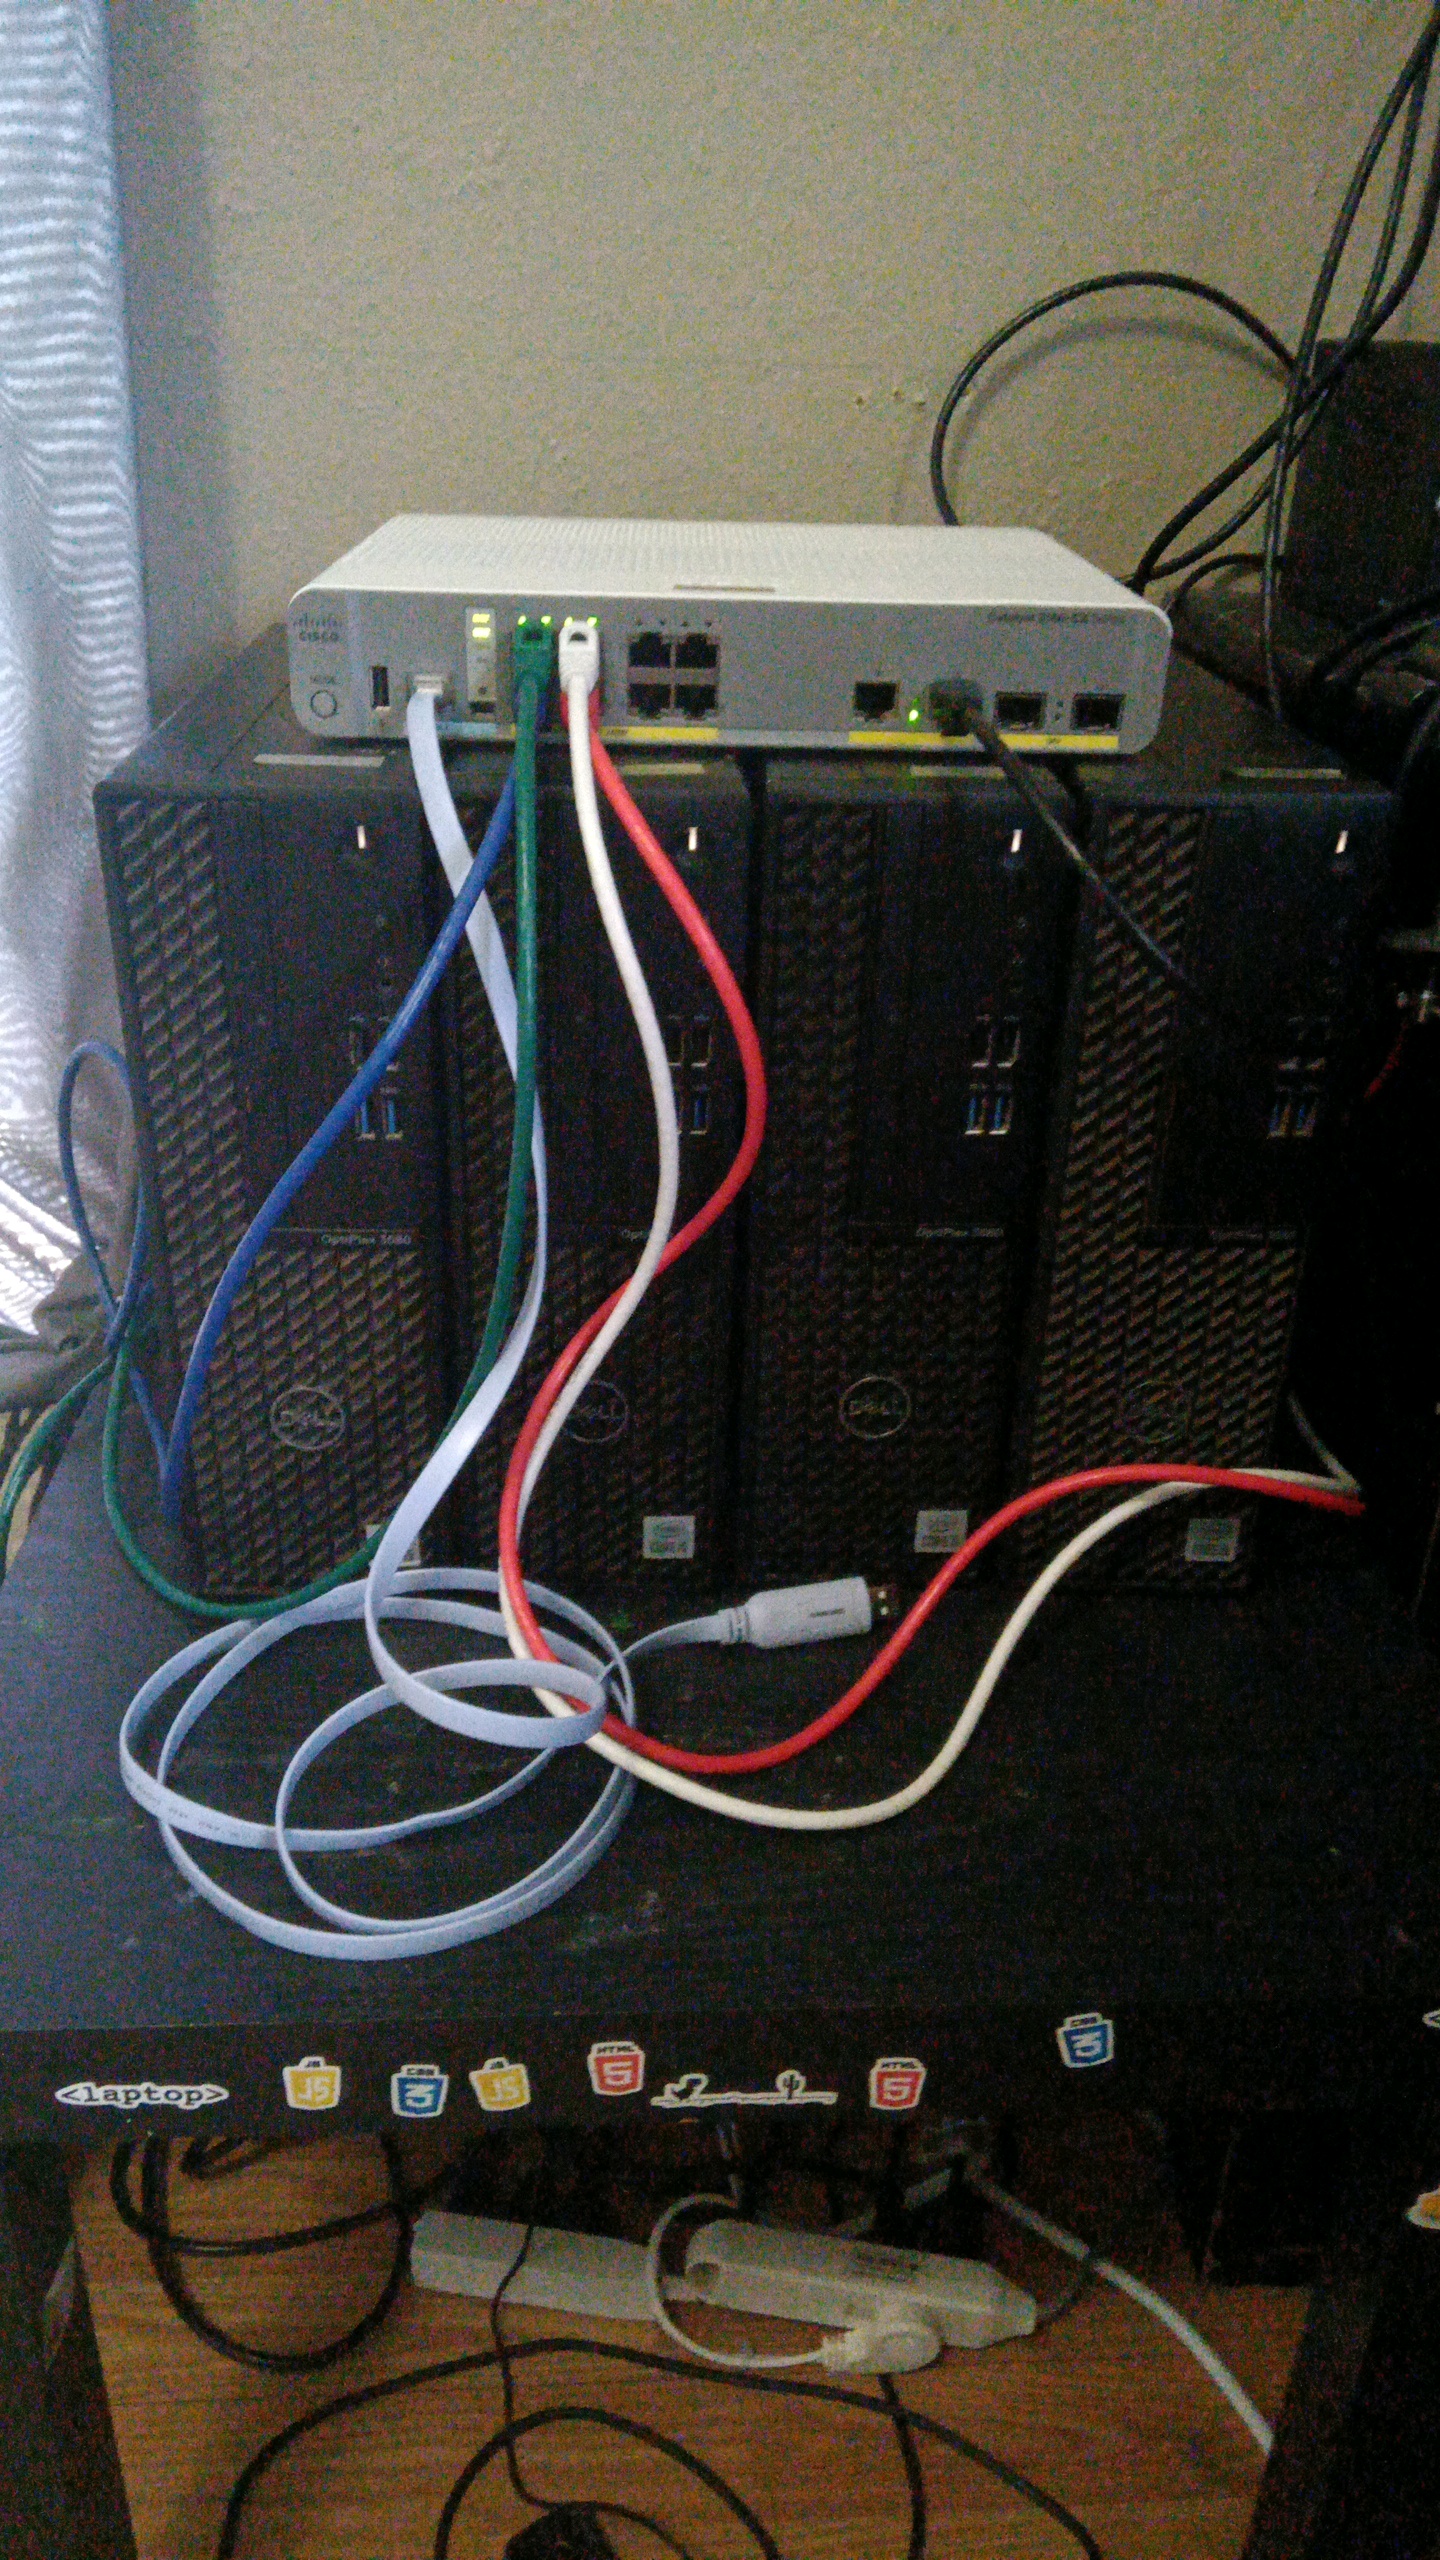
Move over Packet Tracer! Today I'm implementing an actual Cisco managed switch into my homelab environment, my first real Cisco product (ironic considering the Github handle) and also my first managed switch! I finished the CCST Networking course over a year ago and I'm still over here using a Modem/Router/AP all in one from my ISP with a 50ft cat6 running from that to a cheap little 5 port Netgear switch in my office that has managed to cover all of my device needs until recently. While I could've just bought another cheap ass unmanaged switch, I wanted to integrate a Cisco switch into my homelab to actually exercise the muscles that I buffed up learning the Cisco cli. So I purchased a Cisco 3650-CX for DIRT CHEAP and decided to integrate it into my home network environment. This Cisco 3650-CX is a 12 port PoE Gigabit switch, and with it's sleek, solid white design, its a beautiful addition to my homelab and I'm ready to go over this configuration, now lets get started! You just spent the rest of your savings on Cisco equipment, you're gonna get your CCNA and change your life and nothings gonna stop you! But wait! Did you remember to get a console cable? I hope so, its the standard to connect to Cisco devices via a serial connection. There are a few variations of this cable, but I'll be using a RJ45 to USB cable today, which I'll be connecting to my laptop running Arch Linux. The first thing that you're gonna wanna do is connect the console cable and make sure that the switch is powered on. Then we're gonna make sure that your user has permissions to access the serial ports, which can be accomplished by grabbing either uucp on Arch-based systems, or dialout if you're running Debian and add your user to the usergroup with a: sudo usermod -aG uucp yournamehere or sudo usermod -aG dialout yournamehere and you should be good. There's a few different options toconnect to your device from here. I went with GNU screen, but I also grabbed PuTTy because it was easier to troubleshoot with. Then go ahead and run a: sudo dmesg | grep tty and you'll find something along the lines of ttyUSB0, which is what we need to connect via the console cable in either screen or PuTTy, the screen command is going to be: screen /dev/ttyUSBX 9600 (your USB number replacing 'X') Assuming that everything goes smoothly, you should be able to get into the CLI for your switch at this point. Mine is the 3560-CX, which does not have as much documentation floating around online as other models in the 3560 series, and led to some issues with when/how I needed to use the Mode button to accomplish a factory reset, as old user configs and files were still on the device and I don't want anything to do with that. This involves holding down the Mode button for around 15 seconds or so (I don't remember exactly how I did this, but starting to hold the Mode button as you plug in the power definitely doesn't work for this model) until you see a switch: prompt pop up. Now we can do things! Go ahead and dir Flash: to peak into the flash memory, and we can get rid of all of the previous user's stuff. Go ahead and del all of those, as well as the flash:config.text and vlan.dat files, then boot and bam! You should have a fresh switch ready for whatever you need. Enter the initial setup...I had a full verbose explaination of this process, but it got lost when my laptop shutdown and I accidentally wrote over the swp file trying to recover it (but I learned how to not use :recover in NeoVim) so I'll just go ahead and wing it the best that I can. So boot up, yes to enter initial configuration dialog, yes to basic management setup, give your switch a hostname, put in your secret, password, en password, and terminal password and put them into a password manager or somewhere else safe. No to SNMP, vlan1 for the int, yes configure the IP...pretty basic stuff, especially if you've configured Cisco equipment in Packet Tracer for any amount of time. Alright, now that that is setup, we can en to go int privelaged EXEC mode, put in password, then conf t to get into the configuration prompt after putting in the other password, and this is where we can start opening up these ports for use. I set my switch's IP as 192.168.1.1, with a matching subnet mask of 255.255.255.0, as I eventually plan to segment my network out as it increases in size. You can accomplish this with by using the following commands: ip routing interface vlan1 ip address 192.168.1.1 255.255.255.0 no shutdown ip default-gateway 192.168.1.1 (my main router, which is what its currently connected to) and boom, your switch should be ready to receive those sweet packets. Now for outbound ports, all that I did was access them in config mode with the same interface command (ie interface GigabitEthernet0/1) and enter the no shutdown command. Now I know that I can do a LOT more after this to implement better practices, but this gives me a finished product and I'm able to set up my glorious Proxmox cluster after 1 more VERY IMPORTANT command. Since we just did all of this work we'll DEFINITELY want to save running-config startup-config to save our new switch configuration to boot into. Truth be told, I did this like 4-5 times when I actually did this, but since I somehow managed to destroy my original write-up, 1 works lol. But yeah, now I have an awesome Cisco managed switch in my office and I couldn't be happier with it. My main excuse for not upgrading my network sooner is the same as many, financial. Homelabbing can be ridiculously expensive if you haven't ....networked with people in the community (I'll show myself out). I don't want to say that this makes it gatekeep-y because companies like Cisco and Juniper make sure that free resources are available to anybody willing to learn this stuff, regardless of financial background. I've spent plenty a hour in Packet Tracer, I've stared into the void of existencial dread as I watched the same video of a guy explaining subnetting on pencil and paper for the 40th time that day and I would still want to cry when I saw anything past a class C network, and been lost in a sea of commonly used ports. And you better not DARE touch my pet alligator m******. That being said, I haven't studied Networking since I took the CCST course last year and all of my experience in the field since then has been purely recreational homelabbing. I don't know Linux so well because I read some books (okay, well I DID read some books but thats not the point) or went and studied for the Linux+, but because I'm a Linux fan, its something that I use everyday that I like a lot. Learn it, Live it, Love it. Elaborate it into a self-help book and sell it. Sometimes it can be hard to be enthusiastic about homelabbing on a budget, you want to replace that ISP modem with a dedicated modem and router, a few APs and switches...not to mention cables, tools, the list goes on. I used to browse a lot of r/homelab, and I learned a lot just nerding out over other people's network setups but you start getting that social media effect where looking at other people's awesome stuff starts to invoke more negative feelings than good and paints the whole thing a certain shade of unappealing. But the enthusiasm is still there, you still maintain the old desktop and SBC that act as your servers, what-have-you, and you pick up a bunch of valuable knowledge along the way. You start to realize that its more about the journey than the destination and the nicest equipment in the world isn't worth a fraction of what you gain just from learning the technology itself. This is the mindset that will make you find excuses TO DO things as opposed to the inverse. If you really enjoy something, you're probably gonna find the money and the time somehow. Anyway, thats it for today. I still feel like the original draft of this was wayyy better and I apologize for the skill issues on that one, but it gets the job done. You amazing people have a great day and I'll see you on the next read! Peace